Trail Management
RESOURCE HUB (in process)
Trails connect people to nature, offering spaces for recreation, fitness, and exploration while protecting sensitive ecosystems by concentrating foot traffic. They serve a wide variety of users, from casual walkers and families to mountain bikers, runners, and serious hikers. Each group interacts with trails differently, highlighting the importance of thoughtful design and management to accommodate diverse needs.
Trails also come in many forms, from narrow single-track trails that wind through rugged backcountry to 12-foot-wide multiuse trails in urban parks. These trails can traverse challenging natural terrain or provide accessible pathways in heavily developed areas. Managing such diverse trail systems requires understanding the unique conditions and challenges each type presents, such as erosion, habitat fragmentation, and conflicts between user groups.
Properly managed trails reduce erosion, enhance user safety, and ensure natural areas remain accessible and enjoyable for all. Volunteers are at the heart of this effort, playing a critical role in maintaining, restoring, and designing trails to make them more resilient and functional.
This learning plan includes five modules to equip volunteers with comprehensive knowledge and practical skills for trail management. Each module features detailed narratives, step-by-step instructions, quizzes, and references to trusted resources, such as master naturalist programs, conservancies, and the Walnut Creek Metropolitan Park Unified Stewardship Plan. Graphics and visual aids provide practical guidance to reinforce key concepts.
Module 1: Introduction to Trail Management
Trail management balances outdoor recreation with ecosystem conservation. Trails guide users along designated paths, protecting surrounding vegetation and wildlife from damage caused by trampling and erosion. A well-maintained trail system ensures safe, enjoyable experiences for users while minimizing environmental impact.
Sustainable trail management relies on principles such as contour alignment, which involves designing trails that follow natural landforms to prevent erosion. Trails should also maintain a consistent width, with clear boundaries to prevent trail widening, which occurs when users deviate from the designated tread. Vegetation near trails stabilizes soil and provides shade, but damaged vegetation can signal overuse or improper design.
Volunteers are key to trail management. They monitor trails for erosion, vegetation damage, and water flow issues. The Walnut Creek Metropolitan Park Unified Stewardship Plan emphasizes the importance of sustainable trail practices, especially in urban areas with high trail usage (pp. 2–6). By learning to identify and address these issues, volunteers ensure that trails remain functional, safe, and environmentally sound.
Recommended Resources
Related Volunteer Tasks
TRAIL BRUSHING — find out how to close rogue trails
TRAIL ARMORING— find out how to reduce erosion, manage water, and create a sustainable trail
Step-by-Step For How to Assess a Trail
Assess Alignment: Examine if the trail follows the natural contours of the landscape. Contour alignment prevents water from pooling and minimizes erosion.
Evaluate Vegetation: Look for healthy vegetation near the trail. Damaged or trampled vegetation may indicate trail widening or overuse.
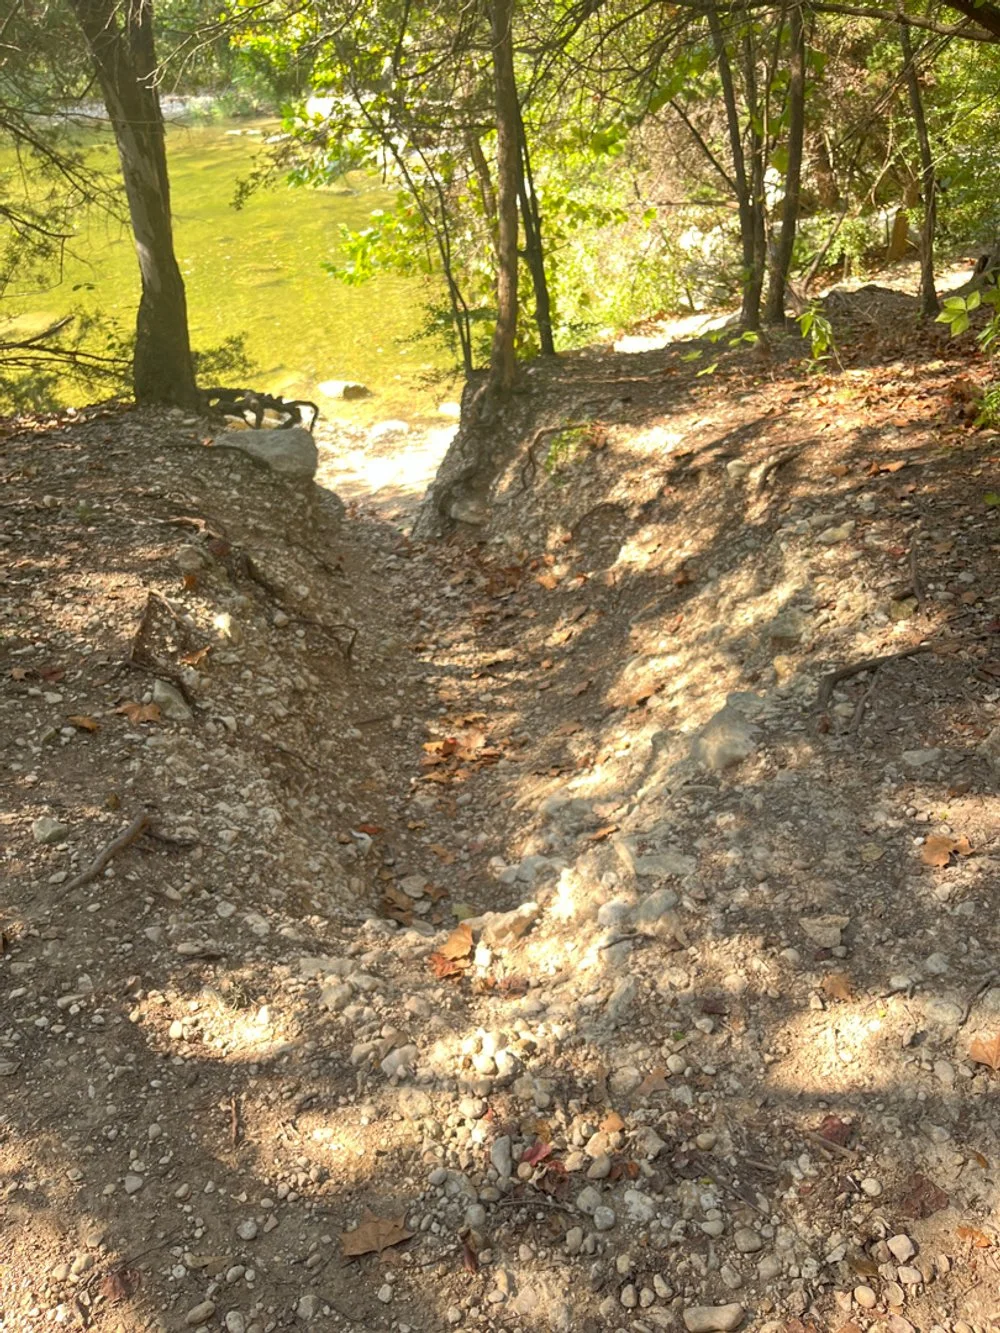
Identify Erosion: Look for signs such as ruts, rills, or bare soil on the trail surface. Erosion often occurs on trails that lack proper drainage.
Check Trail Width: Ensure the trail has clear boundaries and is not excessively wide. A sustainable trail concentrates traffic to a single tread.
Observe Water Flow: Identify areas where water pools or flows along the trail. Proper drainage prevents water from causing erosion.
Document Findings: Record observations and compare them with principles outlined in the Walnut Creek Metropolitan Park Unified Stewardship Plan (pp. 2–6).
Practical Exercise
Visit a nearby trail and observe its condition. Identify three potential improvements based on sustainable trail principles.
Module 2: Erosion Control and Drainage
Erosion is one of the most significant challenges in trail management. Water runoff displaces soil, forming rills, gullies, and destabilized treads that compromise trail safety and sustainability. Erosion also damages surrounding ecosystems by carrying sediment into waterways, reducing water quality and harming aquatic habitats. Addressing erosion is critical, especially in urban parks like Walnut Creek Metropolitan Park, where heavy trail use increases the risk of degradation (Walnut Creek Metropolitan Park Unified Stewardship Plan, pp. 7–12).
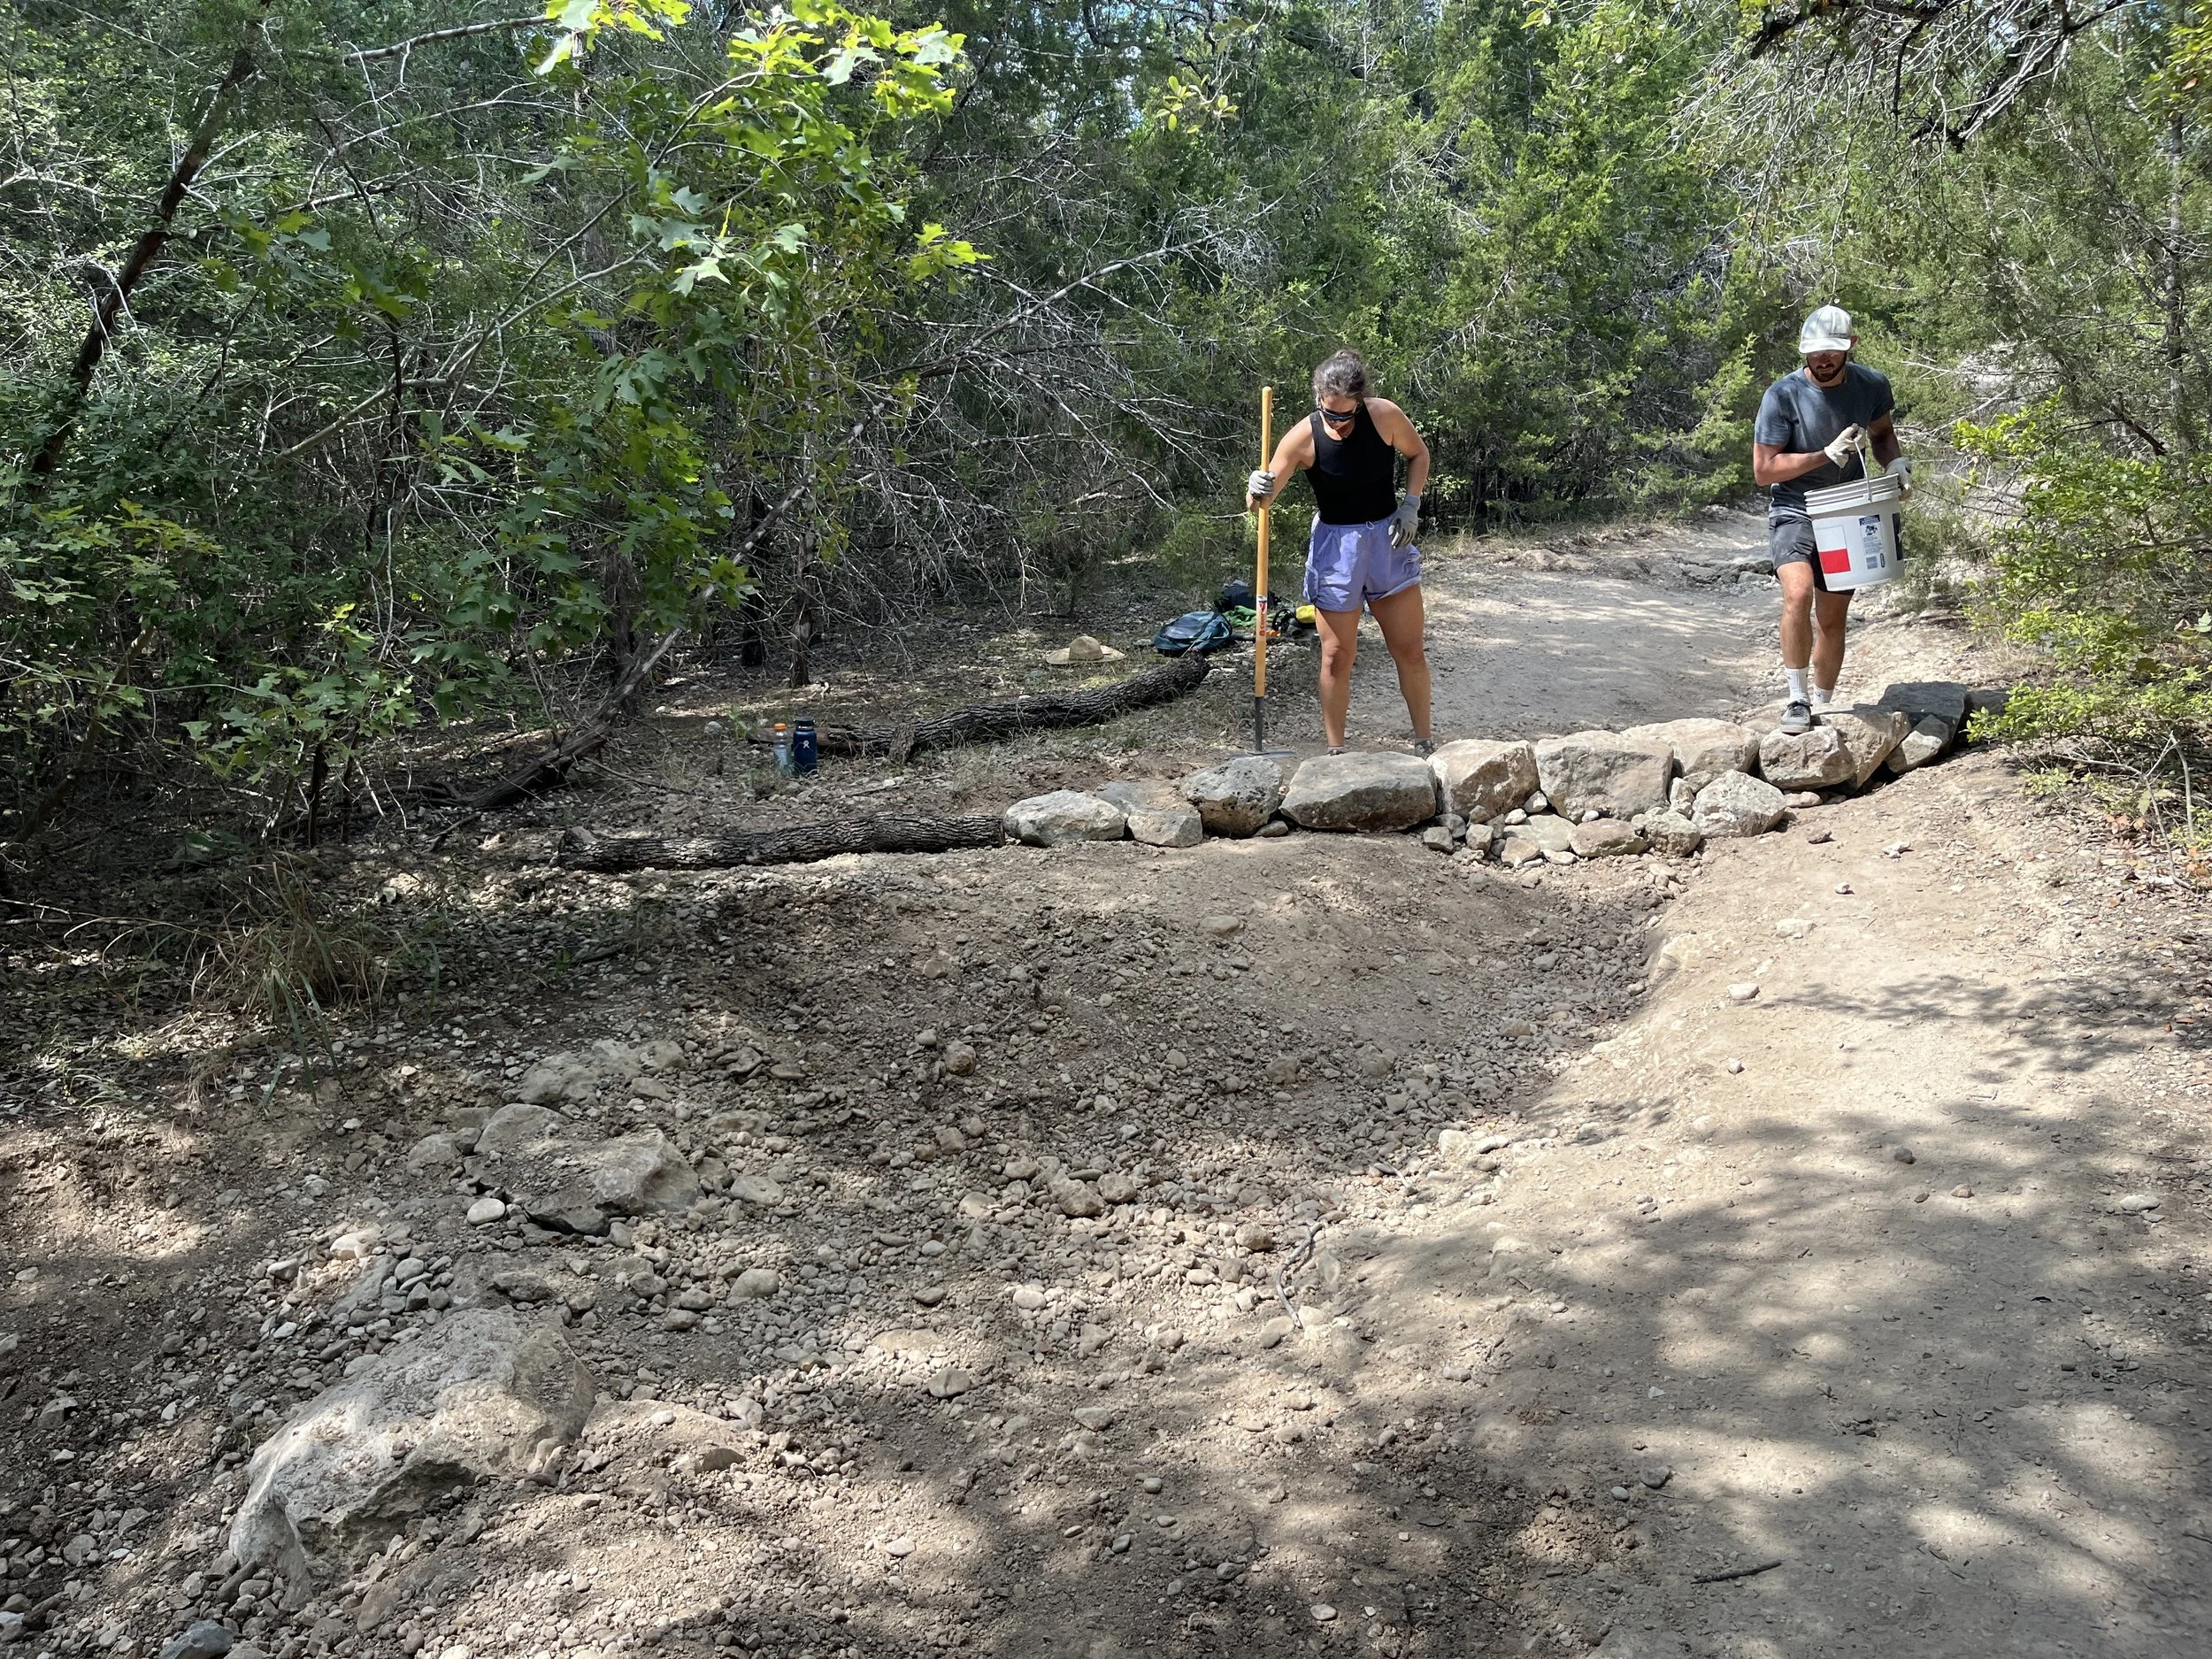
Volunteers play an essential role in mitigating erosion by implementing drainage solutions such as water bars and rolling grade dips. A water bar is a physical structure placed at an angle across the trail to redirect water off its surface. Materials like logs or rocks create a barrier, ensuring water flows away from the tread. Rolling grade dips, on the other hand, are depressions built into the trail to guide water off naturally. Both solutions help prevent water from flowing down the trail, reducing erosion while maintaining accessibility for users.
Proper maintenance is crucial for erosion control features to remain effective. Water bars and rolling grade dips should be inspected after heavy rain or high trail use, and any debris or obstructions should be cleared promptly.
Recommended Resources
Reading: Walnut Creek Metropolitan Park Unified Stewardship Plan (pp. 7–12)
Related Volunteer Tasks
TRAIL ARMORING— find out how to reduce erosion, manage water, and create a sustainable trail
Step-by-Step For Erosion Control
Water Bars
Locate Erosion Points: Identify areas where water flows along the surface, leading to visible rills or gullies.
Select Materials: Use logs or large rocks to create the water bar. Ensure the materials are durable, securely placed, and capable of withstanding runoff.
Dig a Trench: Dig a trench at a 45° angle to the trail, 6–12 inches deep. Extend the trench beyond the trail edges to allow water to flow off completely.
Place the Material: Secure the log or rock into the trench so it sits slightly above the trail surface, effectively diverting water.
Backfill and Compact: Fill the trench with soil around the material and compact it firmly to secure the water bar.
Maintain Regularly: Clear debris from the water bar after storms or heavy use to keep it functional.
Rolling Grade Dips
Assess the Trail’s Slope: Identify areas with long, uninterrupted downhill sections where water is likely to flow unchecked.
Shape the Trail: Using hand tools, lower the trail’s surface in a specific section to create a gentle dip that redirects water off to one side.
Slope the Exit: Ensure the exit slope directs water away from the trail and does not cause pooling or erosion.
Blend into the Trail: Smooth the edges of the dip to maintain a natural appearance and ensure it remains user-friendly.
Inspect Regularly: Monitor the dip after heavy rainfall to ensure it functions as intended and adjust as needed.
Practical Exercise
Visit a trail with visible erosion. Identify an appropriate location and practice designing a water bar or rolling grade dip. If tools are available and you have permission, implement a small-scale solution following the steps outlined above.

Module 3: Retiring and Restoring Unsustainable Trails
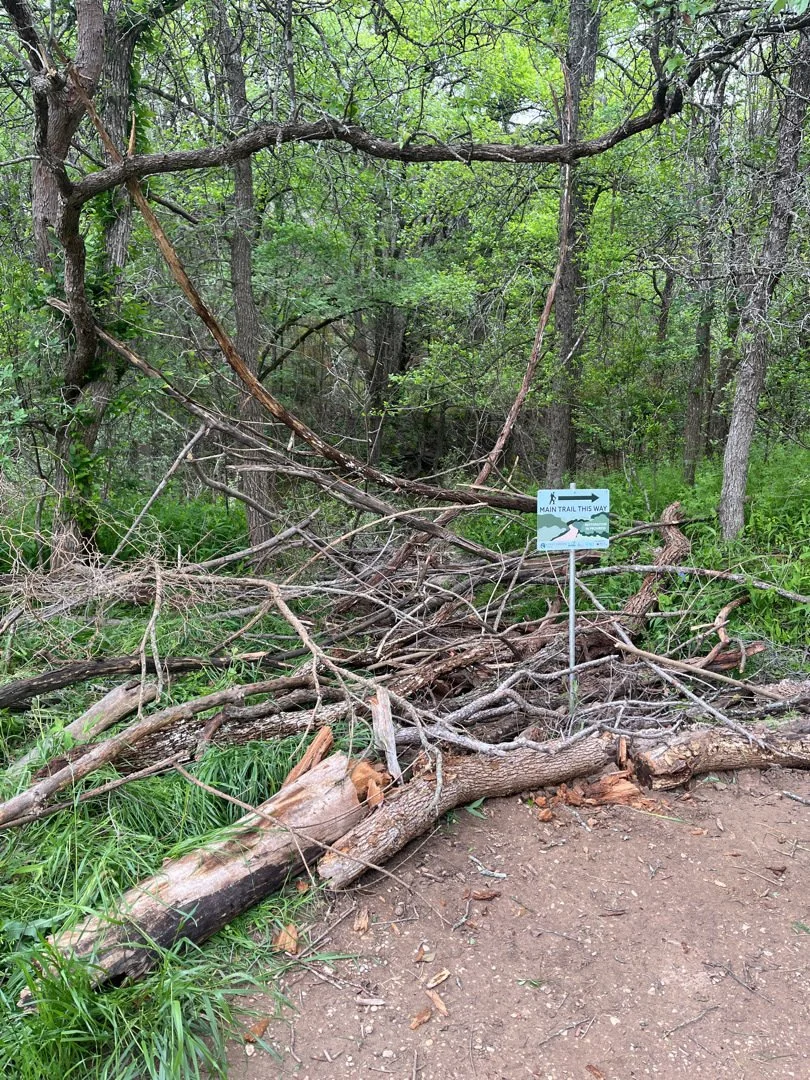
Not all trails are sustainable. Over time, trails may become unsustainable due to poor initial design, heavy use, or environmental changes. One major issue is the creation of desire paths—informal trails created when people venture off designated paths. These paths can quickly lead to erosion, vegetation loss, and habitat fragmentation, harming the ecosystem and compromising the integrity of the trail network.
Retiring unsustainable trails and restoring the surrounding environment are essential to preserving the landscape. Trail retirement involves closing off access to redundant, eroded, or environmentally damaging paths and redirecting users to better-designed trails. Restoration complements this by re-establishing native vegetation, reshaping the land, and implementing erosion control measures to stabilize the area.
Volunteers play a critical role in these efforts by installing barriers, performing brushing to block access, planting native species, and monitoring recovery. The Walnut Creek Metropolitan Park Unified Stewardship Plan identifies trail retirement as a key strategy for protecting sensitive areas and reducing ecological damage in heavily used urban parks (pp. 12–15).
By addressing desire paths and unsustainable trails, volunteers help restore natural ecosystems and encourage sustainable recreation.
Recommended Resources
Reading: Walnut Creek Metropolitan Park Unified Stewardship Plan (pp. 12–15)
Related Volunteer Tasks
TRAIL BRUSHING — find out how to close rogue trails
Step-by-Step For Retiring and Restoring Trails
Retiring a Trail
Assess the Trail: Identify trails that are redundant, heavily eroded, or located in sensitive habitats. Use trail maps and ecological data to support decisions.
Block Access: Install physical barriers such as logs, rocks, or fencing to prevent users from entering the trail.
Perform Brushing: Use cut branches, logs, or other natural materials to make the trail appear overgrown and unappealing.
Install Signage: Place signs explaining the closure to educate users about its purpose.
Monitor Compliance: Regularly check the area to ensure users respect the closure and do not create new paths.
Restoring the Trail
Stabilize the Soil: Use erosion control measures such as wattles, mats, or small check dams to prevent further degradation.
Reshape and Regrade the Land: Fill in rills, ruts, and gullies, and smooth out compacted soil to encourage plant growth.
Remove Invasives: Clear invasive species that may dominate the area and hinder restoration. Use the material for brushing where applicable.
Plant Native Vegetation: Reseed with native grasses, wildflowers, or shrubs to stabilize the soil and restore native plant communities.
Monitor Recovery: Visit the site periodically to document regrowth and adjust restoration strategies as needed.
Practical Exercise
Identify an unsustainable trail in your area. Work with a local conservation group to create a closure plan. With appropriate permissions, practice brushing techniques and outline a restoration strategy, including reseeding native plants and monitoring the area.
Module 4: Sustainable Trail Design
Sustainable trail design is the foundation of effective trail management. Properly designed trails minimize erosion, reduce maintenance needs, and protect surrounding ecosystems. A sustainable trail aligns with natural contours, maintains appropriate grades, and incorporates features like outsloping and switchbacks to manage water flow. These principles ensure trails remain functional and enjoyable for users while preserving the integrity of the landscape.
Contour alignment is a key concept in sustainable trail design. Trails that follow natural landforms shed water more effectively, preventing it from pooling or flowing along the tread. The "half-rule" is another essential guideline, stating that a trail’s grade should not exceed half the grade of the surrounding hillside. This prevents water from accelerating down the trail, which would lead to erosion.
Switchbacks are also critical in steep terrain. Properly constructed switchbacks prevent users from cutting corners, which can destabilize slopes and cause significant ecological damage. Outsloping, where the trail surface tilts slightly outward, helps water flow off the trail instead of down its center.
The Walnut Creek Metropolitan Park Unified Stewardship Plan highlights these principles as essential for managing high-traffic urban trails, where sustainable design reduces long-term maintenance costs and environmental impacts (pp. 16–19).
Recommended Resources
Reading: Walnut Creek Metropolitan Park Unified Stewardship Plan (pp. 16–19)
Step-by-Step For Sustainable Design
Contour Alignment
Survey the Land: Walk the area and observe the natural contours of the landscape. Look for areas where water naturally flows, pools, or follows a specific path.
Plan the Route: Design the trail to follow these contours, avoiding areas prone to erosion or water pooling.
Set Appropriate Grades: Ensure the trail’s grade adheres to the "half-rule." For example, if the hillside grade is 20%, the trail grade should not exceed 10%.
Incorporate Curves: Add gentle curves to reduce trail grade and direct water off the trail.
Outsloping
Tilt the Trail: Ensure the trail tread slopes slightly outward (about 5% grade) to encourage water runoff.
Compact the Surface: Use tools to compact the trail surface and maintain the outslope.
Inspect Regularly: Check for erosion or debris that might alter the outslope and repair as needed.
Practical Exercise
Visit a trail in a hilly area. Observe the natural contours and slopes of the hillside and trail. Note where water is likely to flow or pool and assess whether the trail aligns with the natural contours.
Use simple tools like a straight stick, a string, or visual markers to estimate the slope. Identify areas where the trail might benefit from improved contour alignment or outsloping.
Module 5: Safety in Trail Work
Safety is the cornerstone of effective trail work, ensuring volunteers can contribute meaningfully without risking harm to themselves or others. Trail work often involves physical tasks, hand tools, environmental hazards, and unpredictable weather, making preparation and awareness critical. Proper safety practices not only protect volunteers but also enhance the efficiency of the work.
Key aspects of trail safety include understanding tool use, personal protective equipment (PPE), environmental awareness, and teamwork. Tools such as shovels, picks, and loppers can pose risks if used improperly. PPE like gloves, sturdy boots, and helmets minimize exposure to injuries. Environmental hazards such as uneven terrain, wildlife encounters, and weather changes must be accounted for in every trail work session.
The Walnut Creek Metropolitan Park Unified Stewardship Plan (pp. 20–24) emphasizes the need for safety protocols, particularly in areas with high volunteer activity. Proper training in tool use and situational awareness ensures that volunteers work effectively and safely, reducing the likelihood of accidents.
Recommended Resources
Reading: Walnut Creek Metropolitan Park Unified Stewardship Plan (pp. 20–24)

Step-by-Step For Saftey Practices
Use Proper PPE
Wear Appropriate Gear: Use gloves, sturdy boots, long sleeves, hats and helmets as appropriate to protect against cuts, falls, and other injuries.
Use Eye Protection: Wear safety glasses when working with tools or in areas with flying debris.
Inspect Tools
Check Tool Condition: Look for cracks, loose handles, or dull blades before use. Where there is an issue get other fix it or get other tools.
Use Tools Properly: Only use tools for their intended purpose to avoid accidents.
Plan for Hazards
Assess the Area: Check for uneven terrain, loose rocks, poison ivy, or overhanging branches.
Be Aware of Wildlife: Know how to respond calmly to encounters.
Monitor Weather: Prepare for sudden changes and avoid working in extreme conditions.
Communicate Effectively
Work in Teams: Partner up or work in small groups to maintain clear communication.
Stay Alert: Ensure you are available for communication.
Communicate Clearly: Ensure your needs and the needs of your team are being articulated and understood.
Handle Tools Safely
Carry Tools Correctly: Always carry tools with blades pointed downward.
Store Tools Securely: Keep tools in a safe location when not in use to prevent tripping hazards.
Respond to Emergencies
Ensure you have communication tools or a plan if you do note: Check for cell phone coverage. If it is unavailable ensure you have a way to call for help.
Keep a First-Aid Kit Nearby: Ensure everyone knows its location and basic use.
Assign a Team Leader: Designate someone to call for emergency help if needed.
Document Incidents: Record and report any accidents or injuries to the organizing group.
Practical Exercise
* Inspect PPE for wear and fit.
* Examine tools for damage and ensure they are functional.
* Walk the work area to identify hazards and develop a mitigation plan.
* Practice proper tool handling with a partner to reinforce safety protocols.
Glossary of Trail Terms
Aggregate: Crushed stone or gravel used as a trail surface material to provide stability and durability.
Backslope: The sloped area above the trail tread that helps support the trail and prevent erosion.
Bench Cut: A trail construction method where a flat tread is carved into a hillside, leaving a stable backslope.
Brushing: Using natural materials like branches, logs, or vegetation to block access to retired or informal trails.
Contour Alignment: Designing trails to follow natural landforms, reducing water pooling and minimizing erosion.
Crowning: A trail design technique where the center of the trail tread is slightly elevated to shed water on both sides.
Desire Path: An informal trail created by users deviating from designated paths, often leading to erosion.
Erosion: The process by which soil and other materials are displaced, often caused by water runoff or excessive foot traffic.
Fall Line: The natural path water takes downhill, which should be avoided when designing trails.
Gully: A large, deep erosion feature formed by concentrated water flow, typically deeper than 1 foot.
Half-Rule: A guideline stating that a trail’s grade should not exceed half the grade of the surrounding hillside to prevent erosion.
Invasive Species: Non-native plants or animals that disrupt local ecosystems and can take over natural areas.
Outsloping: Tilting the trail tread slightly outward to allow water to flow off the trail surface.
PPE (Personal Protective Equipment): Safety gear such as gloves, helmets, sturdy boots, and eye protection used during trail work.
Rill: A small, narrow erosion feature caused by water flow, usually less than 1 foot deep.
Rolling Grade Dip: A depression in the trail designed to divert water off the tread naturally.
Ruts: Narrow, shallow grooves caused by repeated traffic, such as from bicycles or hikers, often leading to erosion.
Single-Track Trail: A narrow trail designed for one-way traffic, commonly used by mountain bikers or hikers.
Switchback: A sharp turn in the trail used on steep terrain to reduce grade and prevent erosion.
Tread: The surface of the trail where users walk, bike, or ride.
Trail Corridor: The space above and on either side of the trail tread that must be cleared for safe passage.
Water Bar: A physical structure, such as a log or rock, placed at an angle across the trail to redirect water off its surface.
Waypoint: A reference point along the trail used for navigation or mapping purposes.